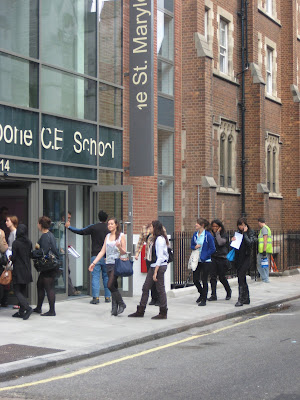
 We were asked to manipulate a photo of the st marylebone school. The first thing i did was use the clone stamp school on the sign. The original sign said "The St Marylebone School" i used the clone stamp by clicking the button on the left toolbar. I then clicked the grey area which i wanted to copy and clicked alt. This then copied the grey area so when i went over the text it would fill the area with the grey colour. This made it look realistic. I also did this on the main sign on the building.
I then used the clone stamp on to erase a pupil's head. I did this the same way by using the clone stamp. I clicked the brick area around the head and pressed alt. This copied the brickwork. I then started drawing over the head. This however looked messy as the brickwork did not line up. I then used a different area of the brick work to cover this up and make the white lines link together.
This is the final product of using the clone stamp, as you can see i have used it well and the person in the first image is no longer there.
This is an image i have taken that i might use for my music magazine. However there is someone completely unrelated behind the drum kit. I use the clone stamp to get rid of her.


No comments:
Post a Comment